A comfortable, leak-free fit starts with two simple numbers. You measure your hips and waist, use the larger result, and check the brand's size chart. That's it.
Getting the best fit and measuring for adult incontinence products takes only a few minutes. Nobody needs to see your numbers but you. Jot them down, tuck the paper away, and you're done.
Go grab a soft measuring tape and stand in front of a mirror. Measuring is easier when you can see the tape stay level. The next few steps will walk you through how to measure waist and hips with confidence, so your incontinence product stays put all day.
Check the brand's size chart every time you order, as sizing varies.
Measure in the morning on an empty stomach for consistent results.
Keep the tape snug and level, and breathe normally while measuring.
Take two or three measurements and average them for accuracy.
Size up if you are between sizes to ensure comfort and leak protection.
Re-measure when you switch brands or notice a change in fit.
Why Measuring Matters
Better Comfort, Fewer Leaks
Good waist and hip measurements are the difference between a product that stays in place and one that sags, bunches, or leaks. A diaper or pull-up that matches your body holds its shape through the day. One that doesn't leaves gaps where moisture escapes.
The payoff shows up in the numbers. A high-quality product can push rewet moisture down to less than 1 gram, while a low-quality product may leave 5 to 10 grams against the skin. Lower rewet means less skin breakdown and better comfort. Retention matters too. A low-retention product needs 6 to 8 daily changes, while a high-retention product needs only 3 to 4. That roughly halves your labor time and laundry loads. Overnight high-SAP products can safely support 8 to 12 hours of wear without compromising skin integrity.
What You Will Need
You need three simple things: a flexible measuring tape, a mirror, and a pen and paper. That's the whole kit. Tranquility Products recommends a soft tape measure for body measurements. Wrap it snugly but not tightly, and keep it level all the way around. Some brands even offer a free measuring kit with a soft tape and step-by-step instructions.
The mirror earns its place. It lets you check that the tape sits parallel to the floor in back as well as in front. Write each number down right away. Memory drifts, and a written record makes comparing sizes far easier.
When to Measure
Timing changes the reading. Measure your waist and hips in the early morning or right after waking up. Do it on an empty stomach, when bloating is least likely. Keep the same time each day for a consistent baseline.
A second measurement confirms accuracy. Take each number twice and compare. If the two readings differ, take a third and use the one that repeats. This small habit gives you precise measurements for incontinence products you can trust.
One last check belongs here. Use the two-finger test. Slide two fingers between the product and the skin at the waist and leg gathers. This ensures a proper seal to prevent leaks while avoiding chafing or restricted circulation.
How to Measure Your Waist
Find Your Natural Waist
Locate the Narrowest Point
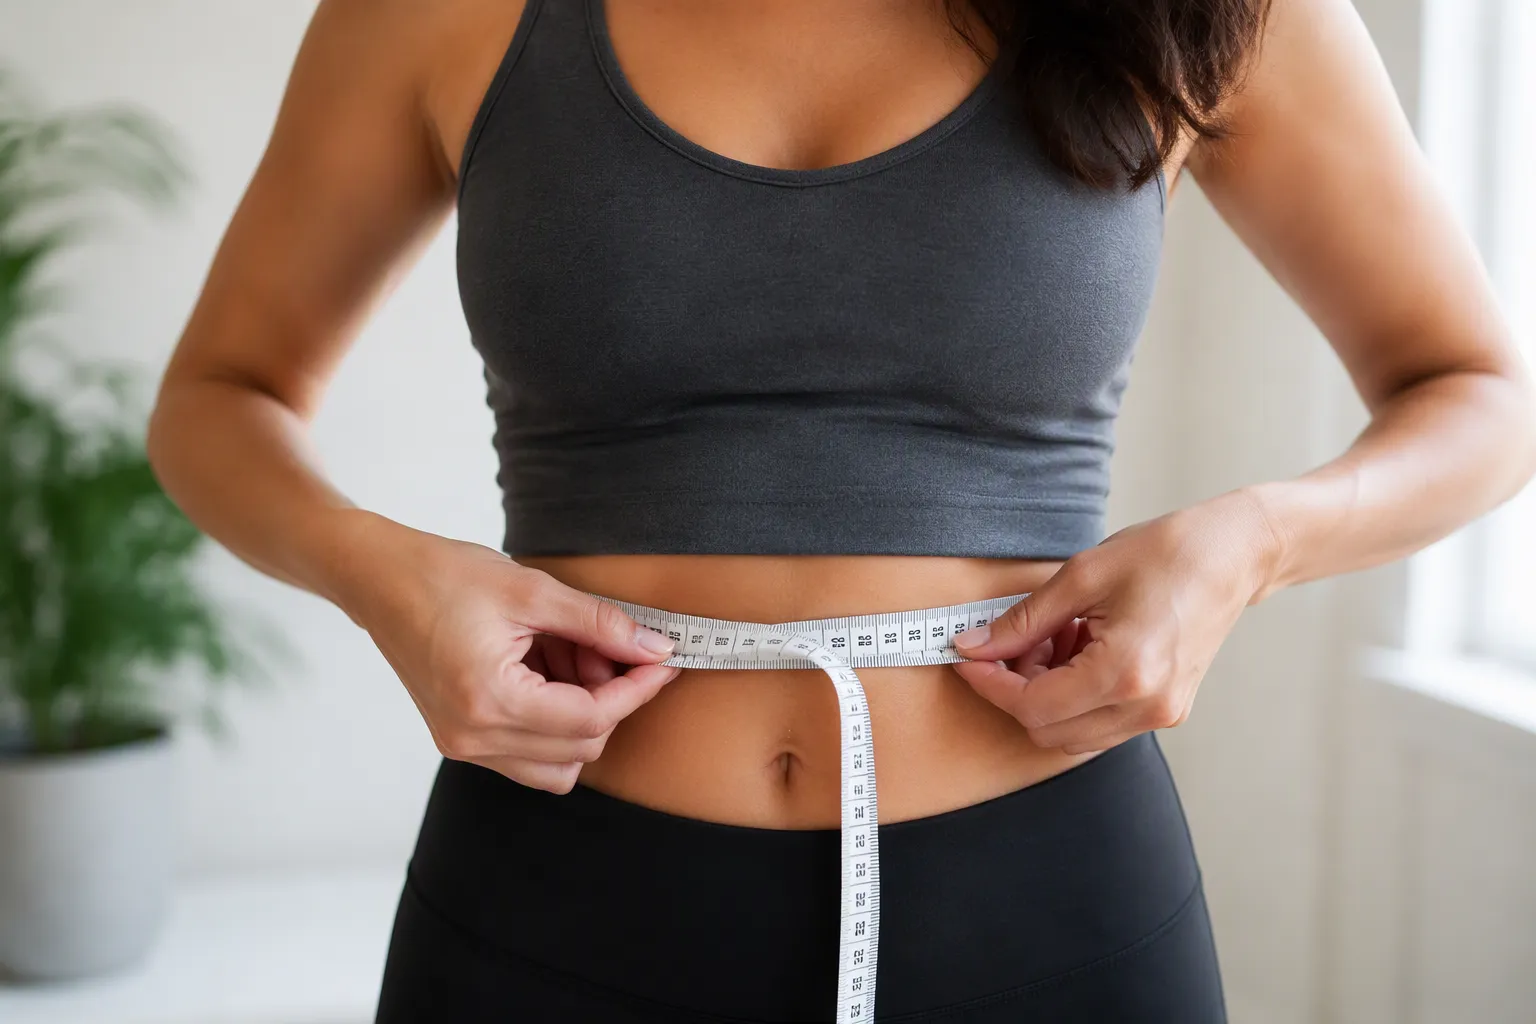
Your natural waist is not where your jeans sit. It is the narrowest part of your torso, and it usually sits a little above your belly button. Stand tall and let your arms hang loose. Look in the mirror and trace the inward curve on each side of your body. That dip is your natural waist.
Many people were taught that the belly button marks the waist. That teaching is a widespread misconception, not an anatomical truth. The table below shows why.
Claim from source
What it means for you
The belly button does not mark the traditional waist.
Using it as a reference is inaccurate.
Belly button placement is not universal.
No single landmark defines the waist for everyone.
Many people were taught the belly button is the waist.
This is a common misconception.
The idea may stem from low-rise jeans in the 1990s.
The link is a fashion-era assumption.
Commenters trace the teaching back to the 1960s.
It is long-standing but still unreliable.
One commenter says it works somewhat for pants but caused dress fitting problems.
Accuracy is inconsistent.
Measuring at the belly button, or where trousers usually sit, is measuring at the wrong location. That skews fit based on your body proportions.
Check Between Hip Bone and Rib Cage
Your natural waist lives in the soft space between the top of your hip bone and the bottom of your rib cage. Press your fingers gently into that gap on each side. You will feel the dip clearly. This spot gives you the most reliable starting point for measuring the waist.
Measuring the Waist Step by Step
Here is how to measure your waist in a clear sequence.
Use a flexible measuring tape to measure the width of your waist, keeping the tape just below the belly button for accuracy.
Measure the widest part of your hips.
Measure the widest part of your thighs, in the area between the hips and pelvis.
Relax during measurement, since tense muscles can affect sizing by up to an inch.
Do not rely on your regular pant size when choosing incontinence products. Absorbent underwear and tab briefs are typically worn just below the belly button, so they need different measurements.
Keep the Tape Snug, Not Tight
Wrap the measuring tape around your waist. Keep it level in front and in back. A mirror helps here. The tape should touch your skin without pressing into it. If you can slide a finger under the tape with ease, it is too loose. If the tape leaves a red mark, it is too tight.
Breathe Normally
Breathing changes the reading more than you might expect. Waist circumference moves 1.5"–2" (4–5 cm) between inhaling and exhaling, and that range holds across all body types. Hold your breath and you capture the wrong number.
Aspect
Detail
Waist fluctuation during breathing
1.5"–2" (4–5 cm)
Chest fluctuation, non-athletes
1.2"–2" (3–5 cm)
Chest fluctuation, fit individuals
2.8"–3.1" (7–8 cm)
Standard breathing protocol
None — guidance varies by tailor
No standard covers anatomical site, posture, or breathing phase. That gap is a major source of measurement error.
Breathe in and out normally. Take your reading at the end of a gentle exhale. That gives you a steady, repeatable number.
Record and Repeat
Write the number down right away. Then measure again. Two readings catch short-term change errors of 2.1–4.8 cm, and three readings tighten that to 1.7–3.9 cm. For long-term change, two readings carry 1.3–2.9 cm of error, while three bring it to 1.0–2.4 cm.
Repetitions
Short-term error
Long-term error
Suitability
Two
2.1–4.8 cm
1.3–2.9 cm
Detects short-term change
Three
1.7–3.9 cm
1.0–2.4 cm
Separates real change from error
Repeat waist measurements at least two, but preferably three times, using a consistent protocol.
Averaging your readings reduces error as the number of repetitions rises. So take three passes, then use the average. If you are helping a family member, measure the width of your loved one's waist the same way, with the same care and the same relaxed breathing. Using a tape measure well is a skill, and a few extra passes make it reliable.
How to Measure Your Hips
Find the Widest Part
Wrap Around Buttocks and Hips
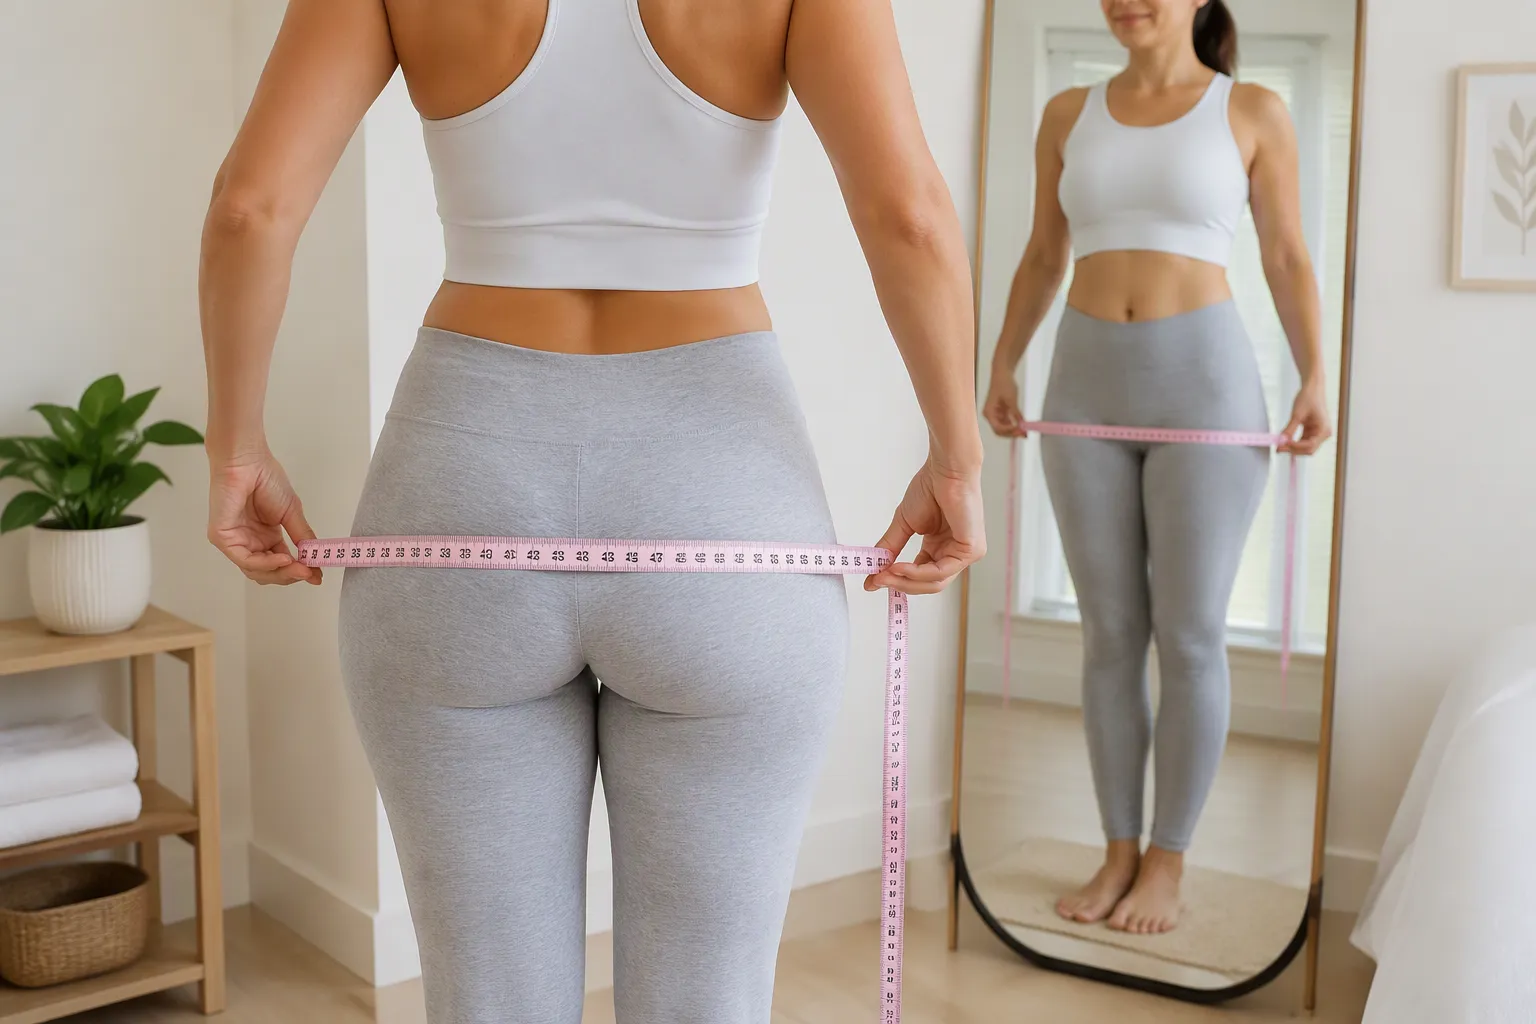
Your hip measurement is not taken at the hip bones. It runs around the widest portion of your buttocks, and the tape stays parallel to the floor the whole way around. This matches the standard body-measurement protocol, so the number you get is the number a size chart expects.
Stand with your feet together for a steady stance. Keep your weight even on both feet, let your arms hang relaxed, and breathe normally. Skip the urge to flex your glutes. A clenched muscle changes the reading, and you want the same relaxed body every time you measure.
Here is the sequence for measuring the hips:
Stand tall with your feet together.
Wrap the tape around the widest part of your hip and bottom region.
Hold the soft tape flat against your body, firm enough to stay put but not tight enough to press in.
Keep the Tape Level
Level matters more than most people realize. A tape that slopes up in back or dips down in front gives you a number that fits nothing well.
Measure around the fullest part of the hips and seat. Keep the tape level rather than letting it angle up or down.
Use the mirror to check both sides. Look at the tape in front, then turn and check the back. The tape should sit flat, with no twist and no dig. If you are measuring the hips on someone else, stand to the side and slide the tape up or down until you find the largest circumference.
Measure for Incontinence Briefs
Knowing how to measure hip size for incontinence products follows the same logic as any body measurement, with one extra rule: measure over light clothing or bare skin, never over bulky outer layers. Note the clothing you wore, the time of day, and your stance. Those notes let you repeat the measurement under the same conditions later.
Consistency is what makes measuring the hips useful. The table below shows the factors that keep your readings repeatable.
Consistency Factor
Requirement for Repeatability
Measuring tape
Use the same tape each time
Measurement site
Use the same site (widest buttock/maximum hip)
Tape level
Keep tape horizontal and level front and back
Stance
Use the same stance position
Clothing
Use the same clothing conditions
Tape tension
Apply the same tension (firm, not compressive)
Number of trials
Take the same number of trials
Documentation
Record notes clearly
A few habits wreck the reading. Watch for these:
Measuring above or below the widest point
Letting the tape slope up or down
Pulling the tape too tightly
Measuring over bulky clothing
Not recording the method used
Comparing different stance positions
Not checking that the tape is level at the back
If you are a caregiver, measure the widest part of your loved one's hips the same way. Explain what you are doing first, ask them to stand upright with feet close together, and keep the tape firm but not compressive. Record the result in centimeters or millimeters, and note the unit so nobody has to guess later.
Record and Repeat
Write the number down as soon as you read it. Then take a second measurement. If the two values differ more than you expect, check the tape position and take a third. Record the average of two close values.
This habit pays off when you measure your hips and waist for incontinence briefs before ordering. You get a pair of numbers you can trust, and you can compare them to a size chart without second-guessing yourself. Learning how to measure once, carefully, saves you from returns and leaks later.
Using a tape measure well is a skill, and repetition sharpens it. Keep your notes on unit, method, clothing, stance, and number of trials. Those details turn a quick check into a reliable record. Waist, hip, and thigh measurements all follow the same principle: same tape, same site, same stance, every time.
Choose the Correct Size
You now have two numbers on paper. The next step is simple. Compare the larger one to the brand's chart. That single rule keeps you from ordering a product that pinches at the waist or slips at the legs.
Take the Larger Measurement
Your body rarely matches a chart on both numbers. One reading usually runs bigger. Use that one.
Guidance
Why it matters
The correct incontinence product size is the larger of the waist or hip measurement; use that larger value when checking the brand's sizing reference.
Ensures proper fit according to the manufacturer's sizing guide.
Manufacturers may change sizing with little notice and often use different sizing guides, so reference guides should be checked frequently when reordering.
Helps avoid improper fit and the inconvenience of a returned order.
Measure the hips or waist, whichever is larger (measure hipbone to hipbone and over the stomach).
Say your waist reads 30 inches and your hips read 40 inches. You shop by the 40. The smaller number never wins here. Your waist/hip size comes from that bigger figure, not the one you like better.
Compare to the Brand's Size Chart
No universal sizing exists across brands. Some brands size by height and weight. Others size by body measurements. Tranquility, Attends, and Depend each publish their own chart, and the numbers differ.
Product Type
Sizing Basis
Size Range
Notable Detail
Protective Underwear (Pull-On)
Height + weight
Small to 2XL
2XL fits up to an 80" waist (larger than typical pants 2XL)
Adult Briefs
Height + weight
Small, Medium, Regular, Large, Extra Large, up to 3XL
3XL fits up to a 100" waist
Chiaus adult care products follow the same principle. Adult diapers, pull-up pants, and incontinence underpads each carry their own size guidance. Read the label for the specific item, not just the brand name. Using a size chart takes one extra minute and saves a return.
Choose the Correct Size Incontinence Briefs
When your numbers land between two sizes, size up. The extra room gives you comfort and leak protection. A snug fit that digs in causes more trouble than a slightly roomy one.
Samples help too. Every brand and style has its own unique fit, so a trial pack beats a guess. Re-check the product size chart each time you reorder. Manufacturers update sizing with little notice.
Getting the best fit and measuring for adult incontinence products comes down to this. Measure your hips and waist for incontinence briefs, pick the larger value, and match it to the chart. That habit leads you to the right incontinence wearable size every time.
Check the Fit
Snug but Not Tight
A proper fit feels snug at the waist and legs without digging in or leaving red marks. You should walk, sit, and bend without bunching or pinching. The product should not feel overly restrictive either. If it does, you have the wrong size.
Your body gives clear signals here. Pain, tingling, or numbness around the midsection means the product is too small. Extra material showing outside your clothing means it is too big. A discreet profile under clothes is a good sign. Bulky material that shows through pants is not.
Sign
What it indicates
Snug at waist and legs without digging in or leaving red marks
Proper fit
No bunching or pinching when walking; not overly restrictive
Proper fit
No leakage
Proper fit
Discreet under clothing; no bulky material visible
Proper fit
Frequent leaks
Wrong size (too big or too small)
Chafing or redness from leg cuffs or bunched material
Wrong size (too tight or too loose)
No Gaps at the Legs
Side leaks usually start at the legs. Gaps form when the product does not sit close enough to the body. Folded leg guards make it worse. So does a size that runs too large. Unfold the guards, center the core, and reassess the size and shape.
Elastic leg openings help close those gaps. Check that the leg cuffs lie flat against your skin with no openings. Run a finger along each leg opening. If you feel a gap, adjust the placement before you trust the product.
Around the legs, leaks trace back to gaps, folded guards, incorrect size, rapid flow, or narrow coverage. Unfold the guards, center the core, and reassess size and shape.
Secure Tabs and Smooth Shape
Tabs should fasten securely and hold through movement. The product should sit smoothly against your body with no twists or wrinkles. Fasten one side, then the other, and check the mirror before you go about your day.
Quality backing matters too. Chiaus adult incontinence products go through a robust quality monitoring system and carry certifications such as FDA, ISO, and CE. CE marks confirm compliance with medical device regulations in applicable markets. FDA registration demonstrates compliance with US medical device requirements. ISO certification indicates adherence to recognized quality management standards. That combination supports reliable performance, and it makes finding the right fit for incontinence products easier to trust.
Getting the best fit and measuring for adult incontinence products comes down to a quick check in the mirror. Confirm the correct size, test the leg openings, and smooth the shape. A few seconds of checking keeps your incontinence briefs comfortable and leak-free all day.
Avoid Measuring Mistakes
Measuring Over Bulky Clothing
Thick clothing adds inches that aren't really there. A pilot study of 50 people found that hip measurements taken over light clothing differed from underwear measurements by an average of 2.58 cm. Waist readings over light clothing differed from bare skin by 0.50 cm. Those gaps grow larger with heavy layers like sweaters or jeans.
Measurement Site
Comparison
Mean Difference
Waist
Light clothing vs. bare skin
0.50 cm
Hip
Light clothing vs. underwear
2.58 cm
Measuring over heavy clothing adds inches that aren't really there; measure over light layers or bare skin instead.
Strip down to underwear or a thin shirt before you start. That small step keeps your numbers honest.
Pulling the Tape Too Tight or Too Loose
Tape tension changes the reading as much as clothing does. Pull too hard and you compress soft tissue, which shrinks the number. Leave it loose and the tape sags away from your body, which inflates it. Either mistake sends you to the wrong size on the chart.
Aim for snug and level. The tape should touch your skin without pressing in. Slide one finger under it — if it glides easily, tighten up. If it leaves a mark, loosen it. Check the mirror to confirm the tape stays parallel to the floor in front and back. This habit matters most when measuring your waist, where the tape tends to ride up or dip.
Guessing Instead of Re-Measuring
Your body changes, and so do size charts. Re-measure whenever you switch brands, since each one publishes its own sizing guide. Re-measure after any noticeable change in fit, too — a product that once felt snug may now dig in or sag.
Treat re-measuring as routine, not a chore. Take two readings each time and write both down. If they differ, take a third. This approach to how to measure keeps your records current and your incontinence briefs comfortable. A few minutes with a soft tape beats a drawer full of products that never quite fit. Good measuring habits protect your skin, your confidence, and your budget all at once.
Three quick actions do the work. Measure your waist, measure your hips, then take the larger number to the brand's chart. That habit is the heart of getting the best fit and measuring for adult incontinence products.
A few careful minutes pay you back with better comfort, fewer leaks, and more confidence. Careful placement improves the seal and the feel, just as a well-fitted mask protects better than a loose one.
Re-measure when your body or brand changes. Measure your hips and waist again, and size up between sizes. Compare waist or hips using a size chart. The correct size is the right size, and a soft tape gets you there.
FAQ
Which number do I use if my waist and hips don't match the chart?
Use the larger of the two. Say your waist reads 30 inches and your hips read 40. You shop by the 40. The bigger number keeps the product from pinching or slipping, and it gives you room where you need it most.
Why can't I just buy my usual pants size?
Absorbent underwear and tab briefs sit differently than regular pants. They usually rest just below the belly button, so they need their own measurements. Pant size won't tell you what you need here.
What should I wear when I take the measurements?
Stick to bare skin or a thin layer. Thick clothing adds inches that aren't really there, and those extra inches push you toward the wrong size. A light shirt and underwear give you the most honest reading.
How tight should the tape be?
Snug, not tight. The tape should touch your skin without pressing in. Slide a finger underneath — if it glides easily, tighten up a little. If the tape leaves a red mark, loosen it.
How often should I re-measure?
Re-measure whenever you switch brands, since each one publishes its own chart. Do it again after any noticeable change in fit. A product that once felt snug may now dig in or sag, and a fresh reading catches that early.
What if I land between two sizes?
Size up. The extra room gives you comfort and better leak protection. A snug fit that digs in causes more trouble than a slightly roomy one, so lean toward the larger option when you're unsure.
Do all brands size the same way?
No. Some size by height and weight, others by body measurements, and the numbers differ from brand to brand. Chiaus adult care items each carry their own size guidance, so read the label for the specific product.
How do I know the fit is right once it's on?
Check three things. The waist should feel snug without digging in. The leg openings should lie flat with no gaps. The tabs should hold securely and the product should sit smooth against your body. A quick mirror check confirms all three.